Friday, January 29, 2016

Bloggers at Home: Featuring Savannah of The Perfected Mess

Today we're touring the lovely home of Savannah Patrone of The Perfect Mess blog. Thanks for inviting us in, Savannah! I'll let Savannah show us around her light and airy home. Enjoy and have a fantastic weekend!


Hi everyone, I'm Savannah from The Perfected Mess blog!  I'm a hairstylist gone MIA and on a mission to spruce up my neglected home with intention.  When I'm not focusing on my home, I'm busy being a wife, a mommy to the sweetest little girl and 2 fury little pups.  I've got a lot on my plate and it's never perfect, so I just choose to perfect the mess that is and move on with my day!


Savannah's decorating style...
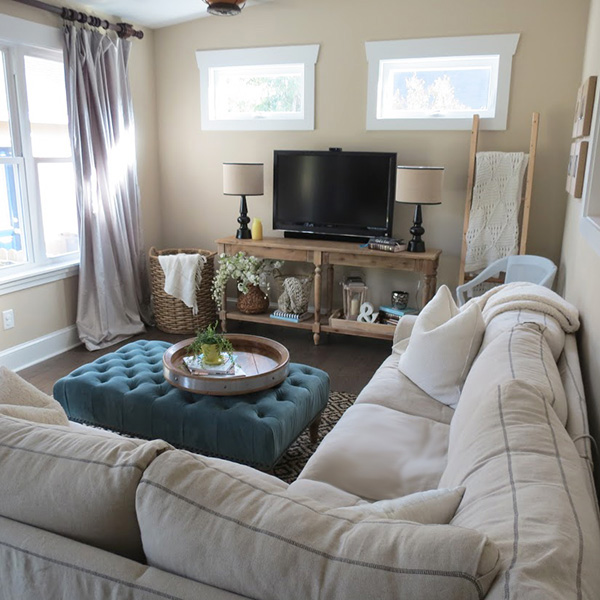
My decorating style is very mixed, I think. I throw in a lot of transitional items that can be used in an array of settings.  My bedroom has a slight modern feel while my living room might seem farmhouse-ish with a smidgen of subtle modern touches. I love anything gold and my go to color scheme tends to lean towards tan and white. 


Savannah's favorite place to cozy up at home...
My favorite spot in my home as of right now, has to be my bedroom.  I wanted my bedroom to express a sense of style my husband could relate to as well, so I choose a gray Pottery Barn duvet, a variety of shams and navy blue velvet curtains.  I love my bedroom because of all the light.  We have a beautiful window above our bed that we choose not to cover.  I would choose that wake up call over an alarm clock any day!


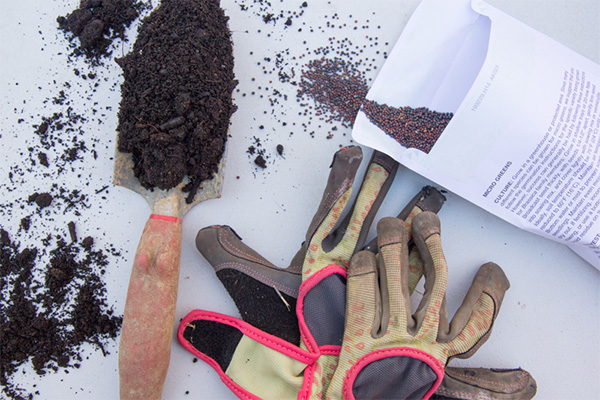
My adventures with painting furniture are hilarious!  I'm a rookie at best and I always aim for the short cut, which any pro furniture painter would tell you, "slow and steady wins the race".  My favorite form of sprucing up furniture is staining;  I'm a lover of dark stains.  I have many favorite pieces I've worked on and sold, but this retro chair I found for $5 and sold for $70, was by far my favorite.  The vinyl was in perfect condition and only needed to be wiped down and cleaned.


Savannah's perfect day...
This question is actually a running joke in my home because, my husband once asked me the same thing and I gave him the run down of what my perfect day entailed and after I told him, he looked very puzzled.  I asked what was wrong and he says "I noticed neither I nor Izzy (our daughter) were included in your perfect day".  I felt so horrible, but they know I love them deeply.  Since then, I've had time really rethink what my perfect day entails.  My perfect day includes having a cup of coffee with my husband on a porch overlooking the ocean while my daughter naps.  Then playing on the beach all day, picking-nicking around lunch time, watching the sun set and snuggling up for a movie, just the three of us!  That is my perfect day.  


A big thank you to Jacquin for featuring my growing in character, humble, little adobe on her beautiful blog!
Shop HerbKits.com and Save Today!

Wednesday, January 27, 2016

Exploring Traditional Japanese Patterns in Design


I am pleased to bring you another globally inspired post featuring beautiful ceramic tableware from Minzuu Collection. Minzuu is an online shop curating home and personal accessories from around the world. What makes Minzuu so special is that each piece they sell combines century old techniques with modern design, fusing old world and new while empowering global artisans. Today we're heading to Japan to explore traditional Japanese patterns in design


ARANAMI(荒波)
Evolved from Katsushika Hokusai's iconic woodblock prints of seascapes, this water wave pattern was much favored in the Edo period, during which the country enjoyed enormous economic growth and cultural development for over a century. Depicting raging waves of the sea, the Aranami pattern is powerful and visually striking. It has been widely used on textiles, knitting, and ceramics (shop HERE)


TOKUSA(十草)
With blue and white lines radiating from the center, this intricate design of the Tokusa pattern is inspired by the reeds of a type of grass grown in Japan - the "ten grass". From the Edo period till today, Tokusa and its many variations have stayed one of the most loved patterns for Japanese ceramics.  

(Left: Flikr; Right:Gallery Sasian)
KARASUKA (唐草)
Karasuka literally means plant motifs from China. However, such foliage-scroll patterns most likely originated in Central Asia, India, Persia, or Arabia. The patterns are characterized by continuous and repetitive vines, flowers and leaves. They are commonly seen on textiles, ceramics, metal work, and lacquer ware, and sometimes as architectural detailing. 

(Left: La Rabichette; Right: Shop Here)
SEIGAIHA (青海波)
Seigaiha means "blue sea and waves". It presents the vast expanse of ocean with calm, blue waves. This alternating wave crest pattern is one of the most traditional geometrical patterns in Japan, and is commonly used as a background for the main motif to enrich the entire design. With the wish for "everlasting peace & quiet", Seigaiha is also a popular auspicious motif.

(Left: Rakuten; Middle: Table Talk; Right: Samurai Nippon)
ICHIMATSU市松)
A geometric pattern of dark and light squares alternating, Ichimatsu was named after an 18th-century Kabuki actor, Sanokawa Ichimatsu, who wore a pair of pants in this pattern during his performances. Ichimatsu is one of the most widely used patterns in Japan - it can be found in fabrics, lacquerware, ceramics, gardens, interiors, as well as architectural decorations.

Minzuu's founders are enthusiasts of culture, history, and artisanal handicrafts and it really shows in their beautiful collection of Japanese tableware. If traditional Japanese patterns have peaked your interest, then take a look at Minzuu's current collection of Japanese wave dishes below. These designs will make your next dinner party pop!


Minzuu's Japanese wave dishes here.
Stop by the Minzuu website to shop home decor and fashion accessories from Peru to India and around the globe! You can find more globally related content on Interiors by Jacquin blog here.
Shop DecorPlanet.com

Saturday, January 23, 2016

What to do when it's freezing outside? Grow microgreens indoors!


If any of you made New Year resolutions to eat healthier in 2016, then this blog post will definitely be a great resource. Microgreens are full of nutrients and great as a salad, in addition to being a fun, indoor gardening project. It's the perfect activity to try during this cold, winter season. Cassie Johnston of Back to Her Roots, a healthy eating and gardening blog, is showing us just how it's done.  By then end of this post, you'll be able to grow your own microgreens at home, too. 

You might be asking, well what the heck is a microgreen? Well, a microgreen is the new, tender shoot of a vegetable plant. It’s what happens if you let a sprouted seed go a little bit farther into growing, but don’t let it completely mature. These greens are tender, sweet, and insanely good for you—they are literally one of the healthiest veggies on the planet! Newly sprouted, tiny microgreens have up to 4o times the nutrient impact as their mature plant counterparts. 40 TIMES! Just a single example: microgreens from red cabbage seeds have 40 times more vitamin E and six times more vitamin C than fully-grown red cabbage. Crazy, right?

Microgreens make an awesome winter substitute for lettuce or other cooking greens—we like microgreen and sprout salads in the winter when our garden isn’t producing. You can also use them on sandwiches, in stir-frys, or in casseroles. And the best part, they are insanely easy to grow indoors. Like, I promise you can do it. Even if you’ve killed stuff before. You can do it!


So, what do you need to get grow your own microgreens? Not much, actually:
  • Microgreen Seeds: You can use almost any vegetable seed to grow microgreens (some are tastier than others, though), but a lot of companies offer special microgreen seed mixes that are a great option for first-timers. They have a nice variety of tastes, textures and nutrition. I really like the microgreen mixes from Johnny’s Seeds. If you don’t want to go with a mix, cilantro, kale, radishes, basil, and beets are all great seeds to start with.
  • Soil: Seed starting medium is your best bet, but honestly, you can grab just about any potting mix or garden soil from the store and have good luck. I’d personally steer clear of soils that have fertilizers mixed in—you don’t want those yucky chemicals in your greens! We make our own seed starting mix, but there are some really nice organic options available at most stores this time of year. I even saw an organic potting mix at my grocery store last week!
  • Tray: You’ll need something to grow your microgreens in. We use regular seed starting trays—available at most garden centers and hardware stores—but honestly, you can use pretty much anything. These greens aren’t going to stay in them very long, so it doesn’t have to be anything special. A plastic tote or a galvanized tub or heck, even a baking dish!
  • Light Source: There are two ways of going about this—the natural way or the artificial way. For the natural way, all you need is a sunny window. Easy! Unless you have a cat, like we do, and then they will make that warm tray of soil their bed. So we do our microgreens under a fluorescent light in a cat-proof room. You don’t need any kind of special light or lightbulbs. Just get the cheapest fluorescent shop light you can find (we have this one) and outfit it with two regular fluorescent lightbulbs. They’ll try to tell you you need special full-spectrum light bulbs for your grow lights—at about four times the price—and they might make your greens grow a touch better, but not enough to warrant the price in my opinion. Hang the light about four inches above the table where you’ll set your tray.
  • Water: Duh. I recommend using a spray bottle for microgreens.

First step is to fill up your tray with soil. Since these plants aren’t going to be in there very long (9-12 days), they won’t develop a very intricate root system, which means you don’t need a whole lot of soil. About two inches worth should be more than enough.


Then you spread your seeds across the surface of the soil. No need to worry about getting it perfectly even or spaced out equally.


You want to put a pretty thick coating down. Unlike when you’re growing a full, adult plant, you don’t have to worry about overcrowding with microgreens. Pack ’em in.


Next, take a little more soil in your hand, and sprinkle it over the seeds. You’re just looking for light coverage here. Again, no need to be perfect. You don’t have to cover every seed exactly the same.


Then take your hand and lightly press down all across the tray to really set the seeds into their new home.


Last planting step: give ’em a good drink of water. The spray bottle is for later, now is the time to use a watering can or the mist option on your hose sprayer. You don’t want them swimming in water, but you do want them very, very damp. 


Then, put your tray in your sunny spot and wait! Or, if you are putting them under a grown light, place them directly under the light. You actually want the light to almont be touching the top of the tray (the light in this picture is actually a bit too high up.) 


 If you’re trying to start your seeds in a particularly cool place, you might want to think about either cranking the heat for a few days while the seeds germinate, or use a seed starting mat. You can get seed starting mats from gardener’s supply stores for beaucoup dollars, or you can do what we do, and just use an old electric blanket under the tray. A heating pad works, too!


A few days later, you’ll see even more seed germinating, and then the true leaves starting to show. These are the ones that actually start looking like the plants you are used to, albeit really tiny, adorable versions.


And then after a little over a week, you’ll have a whole tray full of beautiful microgreens. You can choose to harvest at any point after the true leaves show up.

I normally let mine go until about the 10 day mark, when the greens are about two inches tall.


To harvest, you can either clip the greens with sharp kitchen scissors...


Or do what I do, and pull out the greens and shake off the extra soil. You’ll need the soil to be extra dry to do it properly, so I stop watering a few days before I’m going to harvest. Then, on harvest day, pull up the greens, and shake of the excess soil.


Then I do 3-4 wash cycles on the greens, making sure they are full submerged in cold water each time. Then spread them out on a towel and dry them off slightly (a salad spinner works, too). To store, I then wrap them in paper towels and place in an airtight container in the fridge.


The soil can then be composted, and you can start all over again! Or, if you’re really on top of things, you can have multiple trays going at the same time. I’ve found that starting a tray each week ends up working out well for us—it takes us about a week to get through the harvest from one tray.

See, super easy, right? You can totally grow your own food! I promise. Happy growing! 
  

Thursday, January 21, 2016

Fashion meets Interior Design: featuring Niamh McKeever


I've been eagerly awaiting this post all week, and now it's here! I absolutely love to see the stylish outfits fashion bloggers come up with for my "Fashion meets Interior Design" series. Today our blogger comes from Ireland and she has put together a seriously chic outfit for us based on this moody interior design. When bright shades are paired with dark, moody colors a truly unique look is created, which fashion blogger Niamh McKeever explores today.

My name is Niamh McKeever (pronounced "Eve" with an "N" for all you non-Irish) and I'm the Dublin-based blogger behind the blog Your Lawless. I've had the pleasure of living in New York on and off for the past two years working as a film production assistant and costume design assistant. I love life on the go and this year I will be moving to Mexico to Costume Design a play, which I am extremely excited about. 

I started Lawless back in February 2015 to create a site that was passionate about fashion and shopping for chic ladies like myself. The name Lawless is actually my mums maiden name, who has always had a love for fashion. I also have a love and appreciate for fashion, but I don’t follow trends or have a style rule book. I simply like what I like and wear what I want, and so "Lawless" seemed to be the perfect name for my blog. 


Image via House to Home UK featuring a velvet sofa from George Smith, Photography: Simon Bevan


I was instantly intrigued by the interior design inspiration Jacquin sent me. The contrast of color and pattern made this design a must for me. I was immediately drawn to the multi-colored floral pattern combined with the contrast of dark colors. I decided to go for a beautiful floral skirt I bought at Alice and Oliva. This skirt was the perfect match for the interior design inspiration because to my delight, the pattern on the skirt is quite similar to the design photo. For my top, I'm wearing a beautiful bodysuit from Missguided. Missguided is an online store that is very popular in the UK and Ireland and is one of my favorite shops. (It's available in the U.S. too!) Among other stylish gear, Missguided has a large selection of bodysuits whether you are look for long sleeve, short sleeve, plunging neck line, or a turtle neck, they have a bodysuit available in every color. It's addictive. 


When styling an outfit with a strong lavish pattern or bold embellishments, you have to be very careful not to overdo it. Black is usually, if not always, a good color to mix and match. However, if you are going to wear a strong pattern don’t be afraid to experiment with it. One of my favorite looks from this summer was a Dolce and Gabbana combo of floral print and check. Own what you wear and don’t be afraid to be unique. Fashion is fun, so have fun with it!


Shop the look!

You can find my turtleneck bodysuit from Missguided here. Also remember to check out their other bodysuit designs while you're on the website. A bodysuit can be a great wardrobe staple! As for my Alice and Olivia skirt, it is now sold out, but take a look at these fab Alice & Olivia skirts here, here, and here

Stop by Niamh's fashion blog Lawless for your dose of style inspiration and fashion tips. If you're craving more of my "Fashion meets Interior Design" series click here to see the other stylish outfits created for this truly unique series, only found here on Interiors by Jacquin blog. Thanks for reading!

Tuesday, January 19, 2016

Artist Spotlight: featuring Italy's Sandro Vivolo

I have a voracious appetite for artwork, so it always pleases me to introduce another artist to you on the blog. Today I'm featuring Sandro Vivolo, Italian artist and painter. Sandro's artwork is cleverly intriguing, managing to leave its gazer itching to develop the stories of his subjects. In fact, I feel like I could write a novel based on each one of his paintings' subjects.  I'm sure that's the writer in me, but it just goes to show you how inspirational art can be. Sandro is a self-trained, yet acclaimed and awarded artist living in Italy.

Sandro Vivolo's inspiration...
I'm inspired by the relation between people and modern urban landscapes and this, you will see, greatly figures into my paintings. My mediums are oil, watercolor and charcoal. Please enjoy.
Redondo Beach, Oil on paper board, 2008

Sausage Vendor, Oil on canvas panel, 2006 

Magician Cove, Oil on Canvas, 2000

Cuban buyers, oil on masonite, 2008

Going down to the Avana, Acrylic on paper board, 2007

Car Show, Oil on masonite, 2006 ("American Life" collection)

Which of Sandro's paintings featured is your favorite? 

You can find more of Sandro Vivolo's paintings on his website here. Commissions are also available. Have a great week and thank you for reading!
http://www.nambe.com/